How to Prompt Your Character
Master the art of prompting to get consistent, high-quality results from your AI characters. Learn about Basic vs Advanced modes, model differences, and pro prompting techniques.
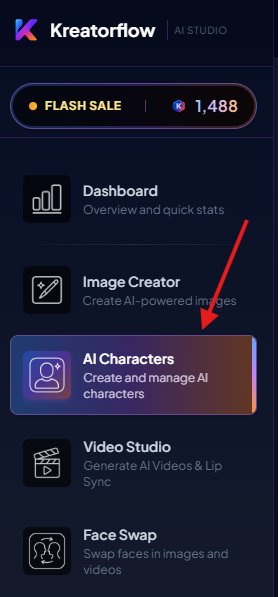
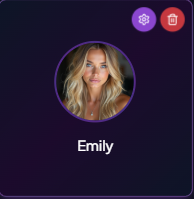
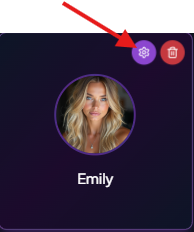
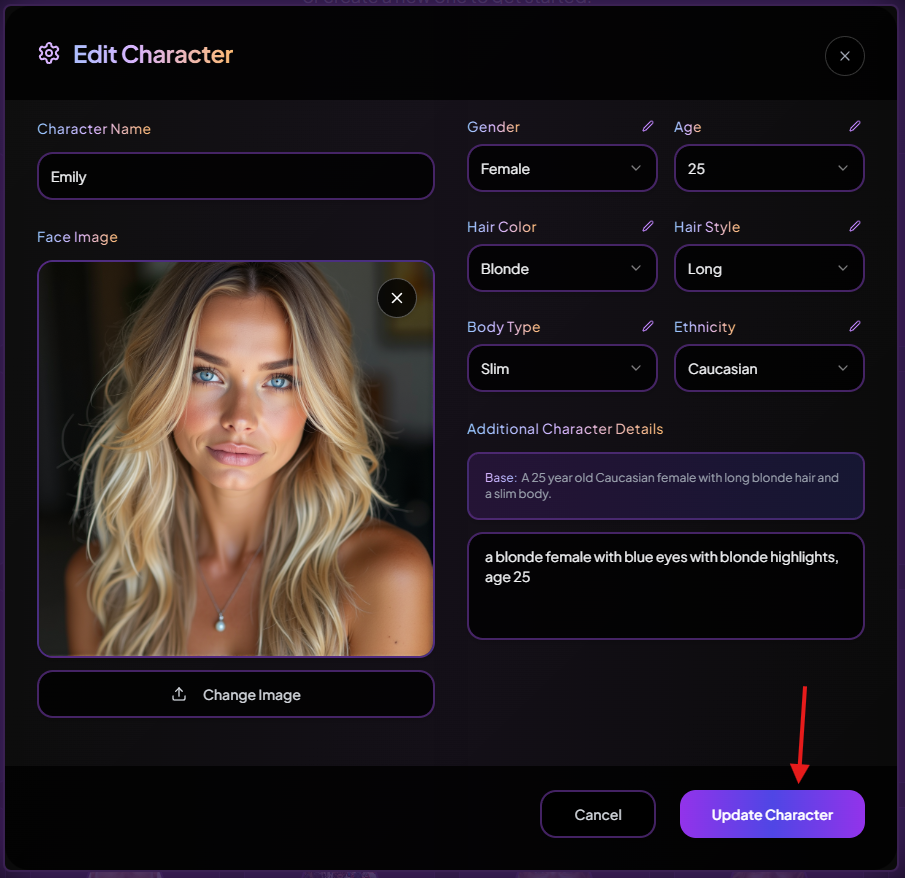
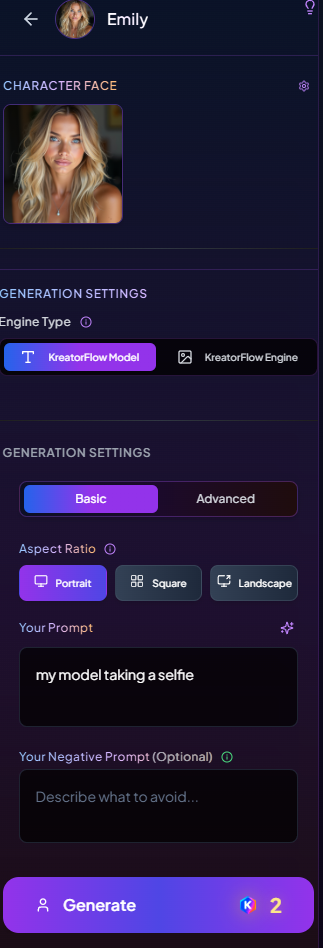
1Choose Your Character
Note: You can also change the settings of the character if you wanted to here
2Select Your Settings
Kreatorflow Model is the best for photorealistic influencer-style images
Kreatorflow Engine is for stylized, more artistic generations
You can either choose the Basic or Advanced
What Both Modes Share
Basic Mode (Fast + Simple)
Use when you just need a good result quickly.
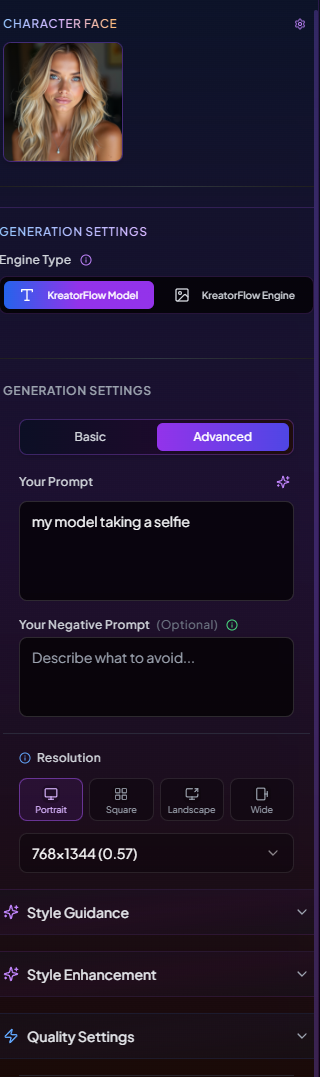
Advanced Mode (Precision + Consistency)
Use when you want studio control or repeatable looks. Adds these groups:
1. Resolution
• Choose exact pixels (e.g., 768×1344 Portrait).
• Higher res ⇒ more detail, longer generation.
Style Guidance
• Positive Style Guidance (toggle + text): Global keywords auto-applied (e.g., "photorealistic, 85mm lens, f/2.0, studio lighting").
• Negative Style Guidance (toggle + text): Global avoid list (e.g., "anime, cartoon, illustration, CGI, plastic skin, low-res, watermark").
• Use these to keep outputs consistent across a batch.
2. Style Enhancement
• Amateur Photography Style (toggle): Adds natural/candid feel (more ambient, less 'studio-perfect').
• Style Strength (slider): How strongly that vibe is applied.
• 10–30% = subtle realism
• 40–60% = strong candid look
3. Guidance Scale (Creative ↔ Accurate)
Controls how strictly the image follows your text + style guidance.
• 1.5–2.0 = more creative, looser framing
• 2.0–2.6 = balanced (good for portraits)
• 2.6–3.0 = very literal to the prompt
4. Allow Anime/Cartoon Styles (toggle)
• Keep OFF for photoreal portraits.
5. Quality Settings
• Ultra Quality (toggle): More steps/refinement ⇒ sharper skin texture & hair detail (costs more time/credits).
• Face Strength (slider): How strongly to match the selected Character Face.
• 0.50–0.75 = natural likeness with variety
• 0.80–0.95 = maximum match/consistency
• Use Grayscale (toggle): Monochrome output.
3Writing Your Prompt
Type your prompt in the "Your Prompt" field. This tells the AI what your character should be doing, where they are, and what they're wearing.
Always include with your prompts such as 'my model' or 'the model'

Apply the settings you would like to use, if you want the best output for your image creation use Advanced and Ultra quality check the step above to see what all the other options have for Advanced mode.
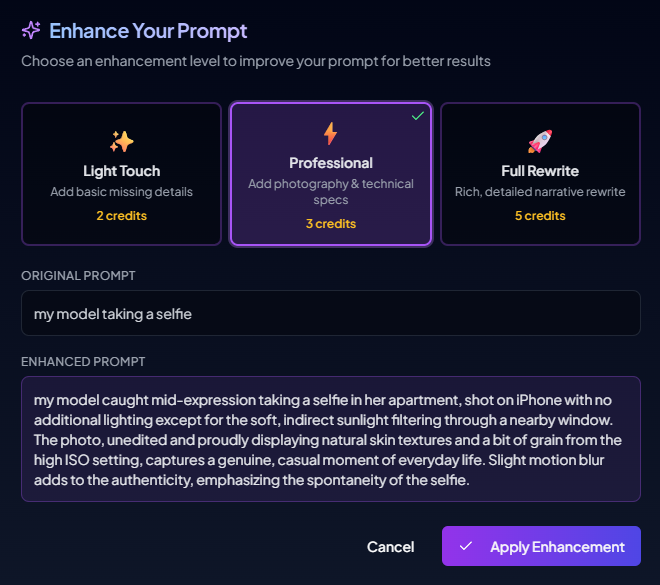
If you need help prompting please use our prompt enhancer
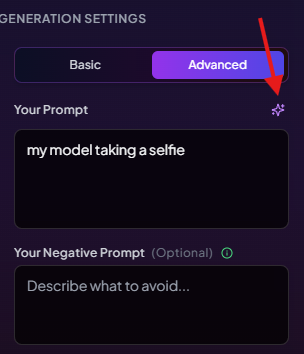
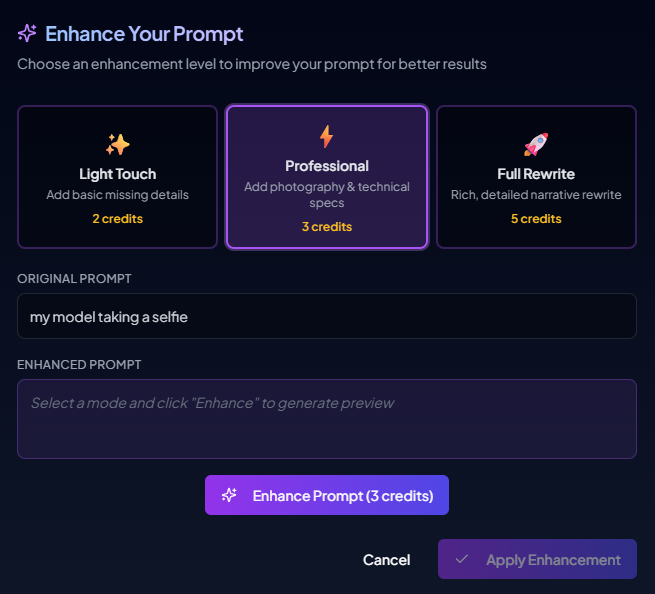
You can choose 3 different settings to help depending on how much prompt rewriting you would need.
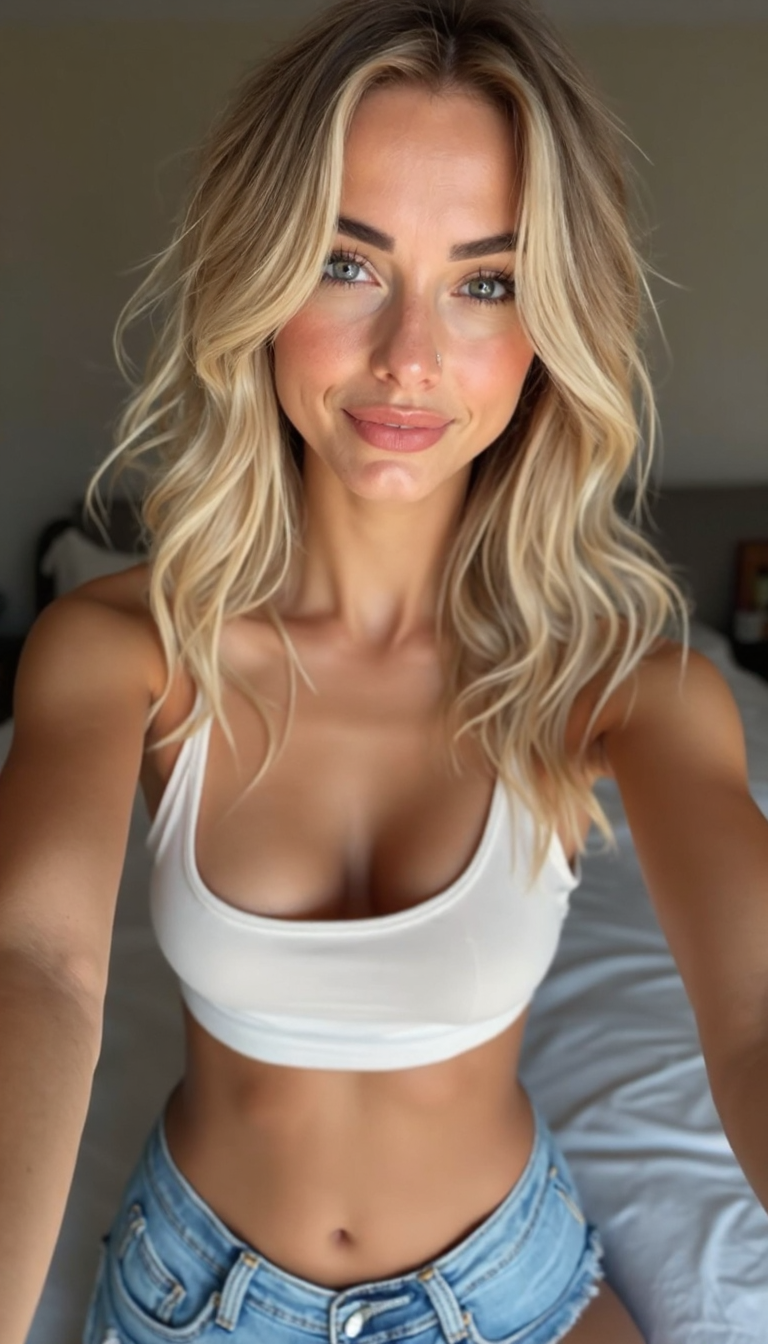
In this example I used Professional and it came out with this outcome.
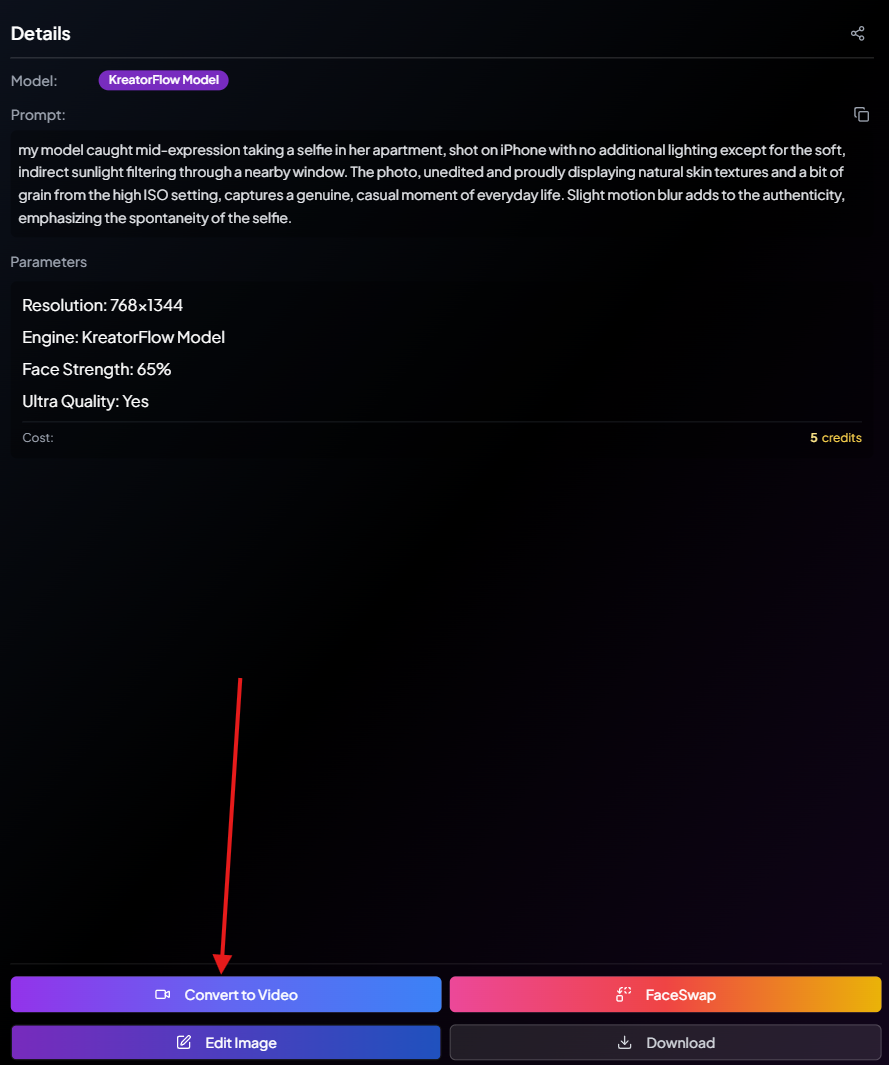
After you have then finished all your settings and prompting you can now generate your image. It will cost anywhere between from 1-5 credits depending on your settings, and also it will go up with accordance to your batch size.

4Convert Your Image to a Video
You also have the option to either FaceSwap, Edit Image or Download it too depending on your needs.
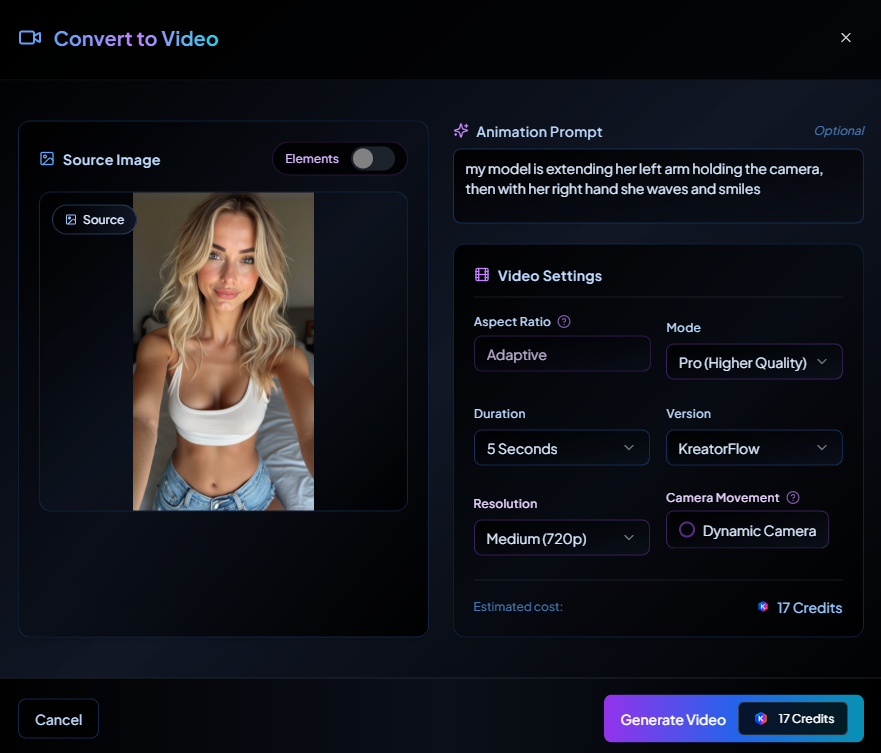
Enter a prompt for your video that you want to generate
The Convert to Video feature lets you animate a still image into a short video clip using AI. You can add prompts to control the motion, camera style, and mood.
Step 1: Select Your Source Image
• Click the image you want to animate.
• Make sure the image is high quality for best results.
Step 2: Add an Animation Prompt (Optional)
• Enter a description of the movement you want, such as:
"My model is extending her left arm holding the camera, then with her right hand she waves and smiles."
• You can leave this blank if you want the system to auto-animate.
Step 3: Choose Video Settings
In the Video Settings panel, adjust the following options:
• Aspect Ratio: Choose Square, Landscape, Portrait, or Adaptive.
• Mode:
- Lite (faster, lower cost, up to 720p).
- Pro (Higher Quality) for smoother and more realistic motion.
• Duration: Select 5 seconds or 10 seconds.
• Version: Select the engine (default: Kreatorflow).
• Resolution:
- 480p, 720p, or 1080p (Pro mode supports up to 1080p).
• Camera Movement:
- Dynamic Camera for natural panning/zoom.
- Fixed Camera to keep the shot static.
Step 4: Review Credit Cost
• The system will display the estimated credit cost at the bottom.
• Example: A 5-second Pro 720p video costs 15 credits.
• Costs vary depending on mode, resolution, and duration.
Step 5: Generate Your Video
• Click Generate Video.
• Wait for processing (usually under a minute for short clips).
⚡ Tip: Start with Lite Mode (5s) to test your animation prompt cheaply, then scale up to Pro 1080p for final polished videos.
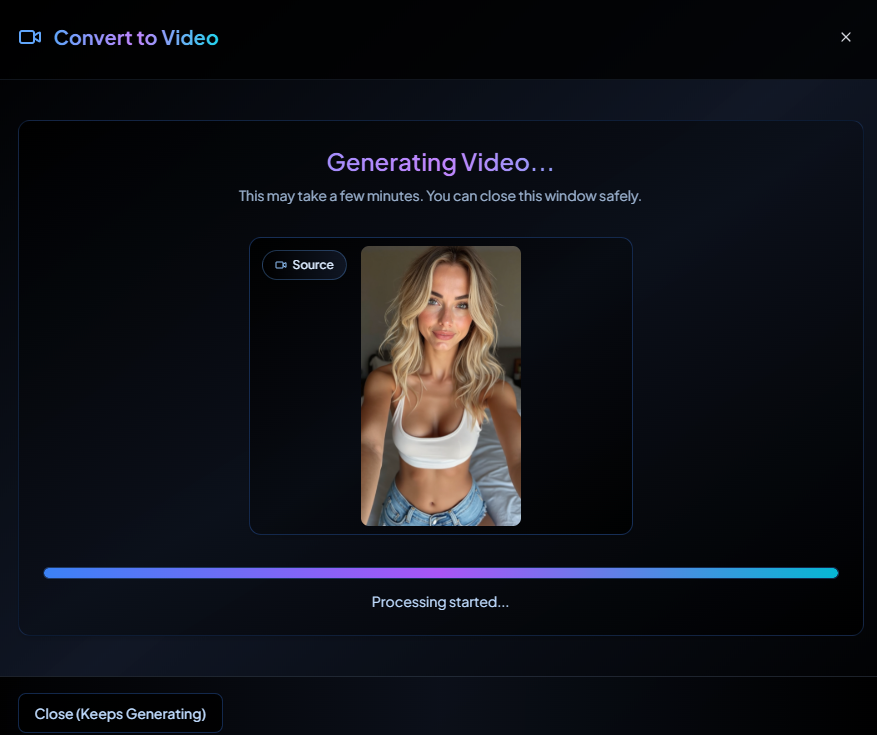
Once you generate the video, it will be processed, you can close it to work on other things while it generates.
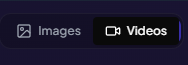
For all the videos you generate with your character it will be located in the videos section in case you get confused.
Continue to Develop Video
You now have the option to either Add Lip Sync / Sound, Face Swap it or Download if you are happy with this outcome
Ready to Start Prompting?
Now that you understand how to prompt your characters effectively, start creating consistent, high-quality content with your AI characters.