AI Image Editor
Transform your generated images with precision AI editing. Change elements while keeping everything else consistent - all for just 2 credits per edit.
Create First, Edit After
Start by generating an image →
Edit Button Appears
On your generated images
How AI Image Editing Works
The AI Image Editor uses advanced seeded editing technology to modify specific parts of your image while preserving everything else exactly as it was. This means you can make targeted changes without regenerating the entire image.
Generate Original
Create your base image using the Image Creator with any model and settings.
Click Edit Button
Find the edit button on your generated image and describe what you want to change.
Get Precise Edit
AI changes only what you specified while keeping the rest of the scene identical.
Key Features
Scene Consistency
Everything except your specified change remains exactly the same - lighting, pose, background, style.
Fast Processing
Edits complete in seconds, not minutes. Much faster than regenerating the whole image.
Affordable Cost
Just 2 credits per edit, regardless of complexity. Much cheaper than a full regeneration.
Natural Results
Changes blend seamlessly with the original image. No visible seams or artifacts.
Multiple Edits
Edit the same image multiple times to refine it exactly how you want.
Works with All Models
Available for images created with both Kreatorflow Model and Kreatorflow Engine.
What You Can Edit
✅ Works Great For:
Clothing & Accessories
"Change shirt to red sweater", "Add sunglasses", "Remove hat"
Hair & Styling
"Make hair blonde", "Change hairstyle to ponytail", "Add hair accessories"
Background Elements
"Change background to beach", "Add flowers", "Remove objects"
Colors & Tones
"Make dress blue", "Change wall color", "Adjust lighting tone"
Small Details
"Add jewelry", "Change makeup", "Adjust facial expression"
⚠️ Challenging Edits:
Major Pose Changes
Completely changing body position or angle works better with full regeneration
Extensive Face Modifications
Major facial structure changes may not preserve character consistency
Complete Scene Overhauls
If you want to change everything, it's better to create a new image
Step-by-Step Editing Guide
Generate Your Base Image
Create an image using the Image Creator. Use any model (Kreatorflow Model or Engine), any settings, and any prompt. The edit feature will work with all generated images.
Locate the Edit Button
After your image generates, you'll see an Edit button appear on the image. Click this button to open the editing interface.
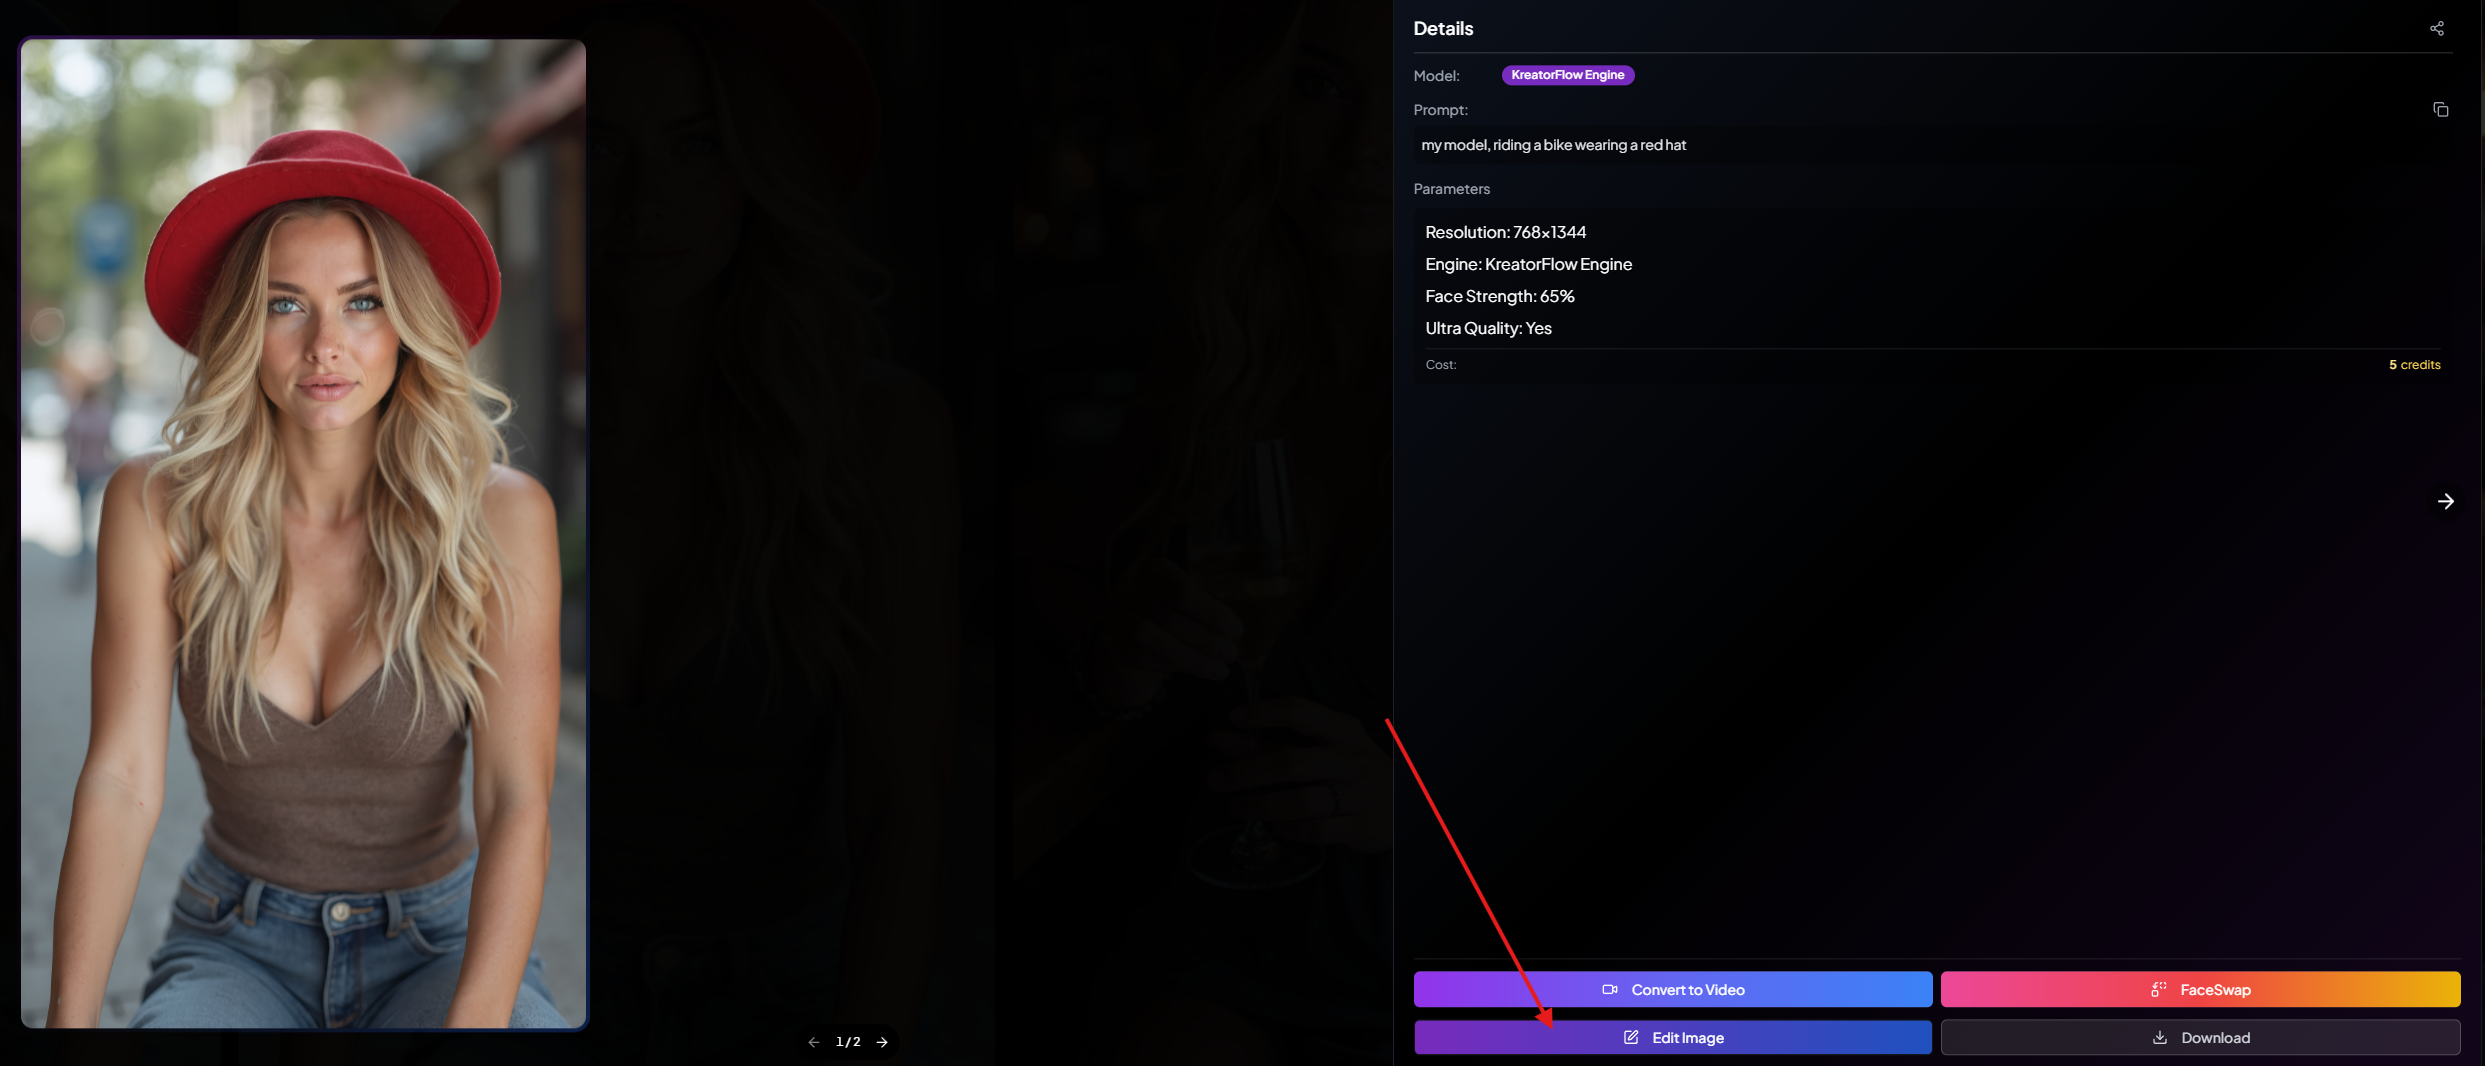
Button Location: The edit button typically appears as an overlay on your generated image, often in the bottom corner or as part of the image actions.
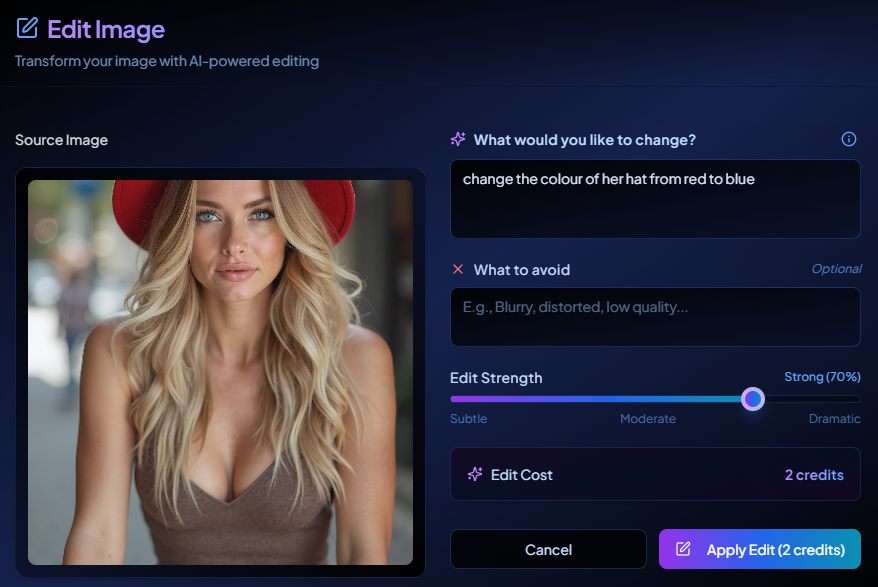
Describe Your Edit
In the edit prompt field, clearly describe what you want to change. Be specific about what should change and what should stay the same.
✅ Good Edit Prompts:
❌ Avoid These Prompts:
Generate Your Edit
Click the edit button and wait for processing. Edits typically complete in just a few seconds. The result will show your requested changes while preserving everything else from the original image.
Real Editing Example
Hat Color Change Demo
Here's a practical example showing how easy it is to make targeted changes. In this demonstration, we'll change the color of a hat while keeping everything else identical.
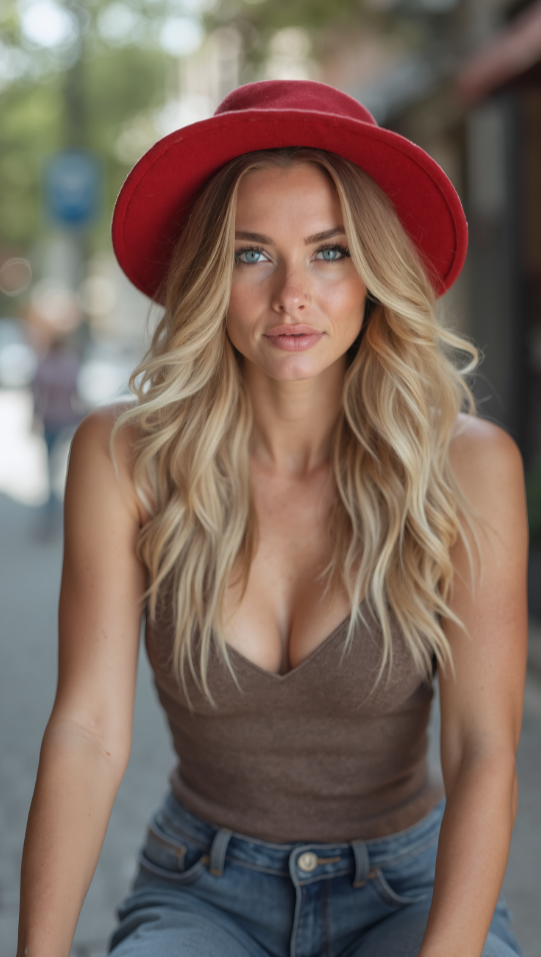
Before: Original Image
Edit Prompt Used: "Change the red hat to blue"
After: Edited Result
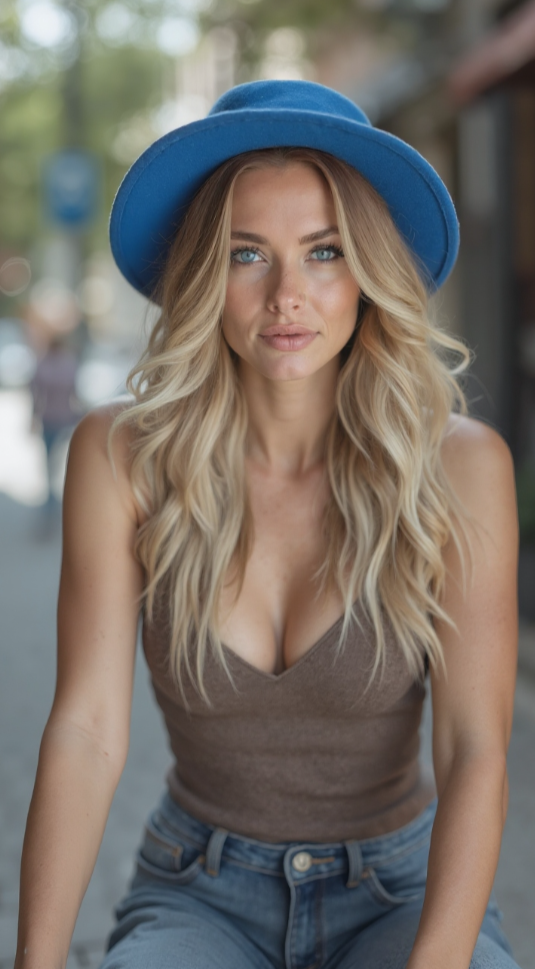
Everything preserved: facial features, pose, lighting, background, clothing style
Pro Tips for Better Edits
Editing Best Practices
Be Specific
Instead of "change outfit," say "change blue dress to black leather jacket"
One Change at a Time
Multiple small edits usually work better than one complex edit
Use Reference Context
"Make the dress the same color as the flowers in the background"
Workflow Tips
Start with Your Best Base
Generate a high-quality original since it affects all subsequent edits
Keep Originals
Download your original before editing in case you want to try different approaches
Chain Edits Strategically
Plan your sequence - do major changes first, then fine-tune details
Popular Edit Examples
Outfit Changes
"Change casual t-shirt to formal blazer", "Add a scarf to the outfit"
Hair Styling
"Make hair curly instead of straight", "Change hair color to auburn"
Background Swap
"Change office background to outdoor garden", "Add city skyline"
Color Adjustments
"Make the blue dress red", "Change wall from white to warm beige"
Add Accessories
"Add gold watch and necklace", "Put on stylish sunglasses"
Fine Tuning
"Soften the lighting", "Add subtle smile", "Adjust makeup tone"
Why Use Image Editing?
Cost Effective
Just 2 credits per edit vs. 1-5 credits for a full regeneration. Perfect for small tweaks and refinements.
Lightning Fast
Edits complete in 10-30 seconds vs. 1-2 minutes for full generation. Perfect for quick iterations.
Preserves Quality
Maintains the exact composition, lighting, and style while making precise changes. No need to regenerate perfect elements.
Ready to Start Editing?
The Image Editor is available on every generated image. Create your first image, then look for the edit button to start making precision changes.